Monday, March 30, 2015

Fabric Tote Easter Basket - Tutorial


For this project you will need two patterns of fabric: one for the outside of the bag and one for the lining.  Two fat quarters will provide enough fabric to make this bag, with a little left over for other projects!  You will also need fusible interfacing if you want to give the bag structure.


1. Start by ironing and cutting your four pieces of fabric.  For the bag, cut two pieces of 12x18 inch fabric (one from each fabric).  For my bag, the blue fabric will be used as the outside of the bag and the white chevron will be used for the lining.  For the strap, cut two long strips of fabric 3.5 inches wide and 16 inches long using the same two fabrics.
2. I used fusible interfacing (pellon 808) on the back of my bag fabric to give the bag some structure. If you use interfacing, cut a 12x18 inch piece and iron it onto the back of the fabric.  I just barely had enough interfacing left for this project, which is why you can see some of my bag fabric peeking out on the side.
3. Take both pieces of 12x18 inch bag fabric and fold them over lengthwise to form a 12x9 inch rectangle.  Make sure you fold them right sides together and pin them in place for sewing.  Teak each fabric separately and sew along both outside edges and the bottom folded edge, leaving the top edge open to form the opening of the bag.  I used a 1/4 inch seam allowance.
 4. Once you finish sewing three sides of the bag fabric, locate the two corners on the bottom of the bag.
 5. Place your hand into the bag and flatten the bottom corner to form a triangle.  Line up the bottom seam and the side seam of the bag and press them both in the same direction.
6.  Measure about 2 inches up from the tip of the triangle and sew a straight line from one edge to the other.
 7. Once you finish sewing both corners, cut off the tip of the triangle you made above the seam line.
8. Reach into the bag and push the new corners out to square them off.  Your bag (still inside out) should stand up now!
 9. Repeat the same steps for the lining.  Here you can see how the bag fabric looks with interfacing compared to the lining.
 10.  Now you are ready to sew the strap!  Place your two pieces of 3.5x16 inch fabric together, right sides facing, and pin them for sewing.  It's hard to tell here, but that is the back side of the
blue fabric.
 11.  Sew along both long edges with a 1/4 inch seam allowance.  You can also sew along one short edge, just keep one short edge open!  When you are done sewing, turn the strap right side out.
12. Iron the strap or just press it down if you are lazy like me :) The unfinished edge will be hidden in the finished bag, so don't worry about top stitching the strap unless you want to.
13. Now it's time to assemble all the pieces!  Keeping the body of your bag inside out, place the strap down into the bag with the top side facing down.  Whichever fabric you want to show on the top of the strap, make sure this fabric is facing down into the bag.  Line the strap up with the two seams on opposite sides of your bag.


 14. Next, place the lining down into the bag on top of the strap.  Make sure you turn your lining right side out before placing it into the bag.
15. Line up the two seams of the lining with the two seams of the bag body and align the ends of the straps with these seams.  Pin all three layers in place at the two sides, then pin all the way around the top of the bag.
 16. Sew around the top edge of the bag with a 1/4 inch seam allowance.  It doesn't matter where you start, but make sure you sew over both ends of the strap and leave a 3 inch opening at the end so you can turn the bag.  When you get to a side seam, check to make sure your strap is still in place and backstitch over it to make sure it stays secure.
 When you are finished sewing, your bag should look like this.
 17. Find the three 3 inch opening you left...
...and carefully push the bag right side out through that opening.
18. It will come out looking something like this. Push the lining down into the bag and smooth out all of the fabric.  Push out the corners at the bottom of the bag and...


...now it actually looks like a bag!
 19. Find the 3 inch opening you left in the seam and press and pin the fabric in place.
20. Top stitch around the top of the bag to close up the hole and to finish the seam.  Sew as close to the seam as possible to catch the fabric at the opening.


And you're done!  You can iron it again to smooth out the wrinkles, or leave it if you're going to hand it off to a destructive toddler anyway ;)


Friday, March 27, 2015

Fabric Tote Easter Basket


I bought Easter fabric on sale a few months ago with plans to make an Easter-themed quiet mat.  I took on a few other projects and when I finally came back to this fabric, I wanted to step away from quiet activities and challenge myself to make something different.  This ended up being such an easy project that it wasn't exactly a challenge, but it was a learning experience!  I may or may not have sewn the lining on inside-out my first try...

Once I fixed the lining, this came together so quickly!  With the exception of the lining fiasco, this project only took 30 minutes total; from ironing and cutting the fabric to completion! I may actually make another one and take pictures of the steps next time, because it's a lot easier than my tutorial below makes it sound :)


The body of the bag is constructed from two long rectangles of fabric and one layer of iron on interfacing.   I didn't measure the fabric I used, but to give you an idea the green chevron fabric was cut from one fat quarter, and I have a little extra left over!  I started by ironing the interfacing onto the back of the blue fabric.  I folded that rectangle over with the right sides of the blue fabric facing together, to make a square.  I sewed around three edges leaving the top open.  Once the fabric was sewn into a square, I flattened the bottom of the bag and sewed a straight line two inches above both bottom corners making a triangle.  I cut the excess triangles of fabric off to square off the bottom of the bag and allow it to stand up on it's own.  I sewed the green fabric for the lining separately using the exact same steps, but didn't add any interfacing.


For the strap, I cut one long strip out of both fabrics and sewed them together right sides facing.  I left one end open and turned the strap right side out.  Once I had the body of the bag and the lining sewn, I assembled all three pieces to sew them together.  Keeping the body of the bag inside out, I placed the strap down into the bag and lined the ends up to the seams on either side of the bag.  Next, I placed my lining (right side out) into the body of the bag and lined up the unfinished seams.  I made sure the bag, lining and strap were all lined up at the seam opening, pinned them together and sewed around the opening of the bag with a 1/4 seam allowance.  When sewing over the handles, I backstitched to keep them extra secure.  I kept a 3 inch opening and turned the bag right side out through that hole.  When you turn the bag right side out, the lining will fall correctly into the bag and the ends of the strap will be secured and hidden in the seam of the bag!  I top stitched (very quickly and sloppily) around the top of the bag to close the 3 inch opening and finish off the seam.


Saturday, March 7, 2015

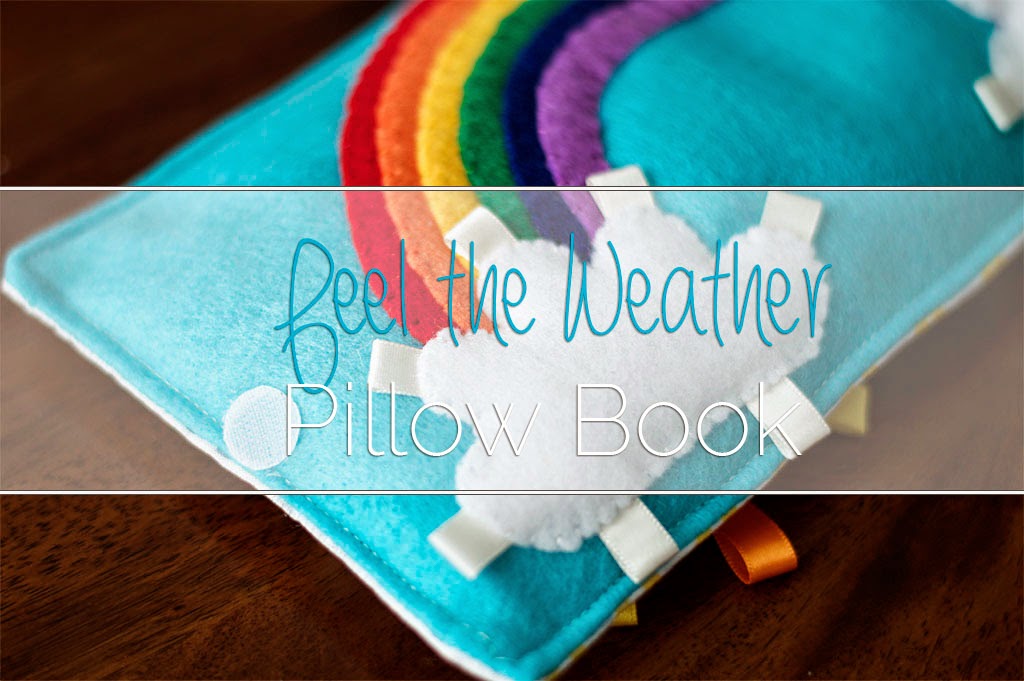
Feel the Weather Pillow Book


This is a small one-page book that I made for my 2 month old nephew.  I knew I wanted to give him something hand-made, but since he's not old enough for quiet book or quiet mat activities yet I decided to make a little sensory book for him instead!  It features different weather scenes in bright colors and offers gentle tactile elements for him to explore.  I also added a mirror underneath the sun for an extra activity.  The whole book is filled with stuffing to give it a plush, pillowy feel and I also used stuffing in the clouds and added loops of ribbon throughout the scenes.  The finished book lays out like a little pillow and will hopefully be perfect for tummy time!


The book itself is made from a long piece of leftover cotton fabric for the outer cover, and a long piece of light blue felt for the inside.  After I finished embroidering the weather scenes, I sewed the two pieces right sides together, turned them and filled the book with stuffing.  I also top stitched around the border this time to make sure the stuffing doesn't come out.  The book stays closed using two velcro dots.


Front Cover
I embroidered my nephew's name with felt onto the fabric and glued a circular piece of flexible mirror to the fabric too.  I sewed an orange felt border around the mirror to keep the edges covered.  I made the sun by cutting two circles out of yellow felt and several pieces of yellow and orange ribbon.  I folded each piece of ribbon in half and glued the ends to the top side of the back piece of felt, so that the ends would be hidden inside the sun.  Then, I put the other circle on top and blanket stitched around the entire shape.  When I reached the top of the sun, I stitched it to the cover to secure it above the mirror.

Back Cover
I cut a cloud shape out of gray felt, 16 raindrop shapes out of dark blue felt and three strips of dark blue ribbon.  For each raindrop, I sandwiched two raindrop shapes around the ribbon and blanket stitched around the entire shape.  Then, I glued the top tips of the ribbons to the cover and whip stitched the bottom of the gray cloud over them to hide their starting point.  I continued to whip stitch around the gray cloud, but left a small opening to stuff crinkly cellophane material into it before closing it.  The storm cloud has a slight crinkly texture and the strips of rain drops are free from the page to touch and play with.


Inside
I cut six curved strips out of rainbow felt colors and stitched each one to the page, starting with the purple.  I whip stitched along the bottom edge, then wedged the next color underneath the top before sewing the top of the strip down.  I repeated this process until I finished sewing all six colors.  I cut two clouds out of white felt and cut several pieces of white ribbon.  As I stitched around the cloud, I would place a loop of ribbon and stitch that down as well.  Before I finished sewing each cloud, I pushed some stuffing into them to make them slightly puffy.


Copyright © 2014 Today I Felt Crafty